What You'll Accomplish
- Create your Cloudgeni account
- Connect a GitHub repository with Infrastructure as Code
- Run your first security scan
- Review and understand security findings
- Total time: ~5 minutes
Step 1: Create Your Account
Sign up for Cloudgeni
Sign up for Cloudgeni
- Go to app.cloudgeni.ai/sign-up
- Sign up using your Google, GitHub, GitLab account (recommended) or email
- Depending on the method you choose you will be presented with specific choices.
GitHub, GitLab OAuth signups are fastest and make onboarding simpler.
Step 2: Connect Your First Repository
Connect GitHub Repository
Connect GitHub Repository
- In the Cloudgeni dashboard, navigate to
Settings->IaC Repositoriesfrom the top navigation bar - Select Connect GitHub from the integration options
- Click
Connect GitHubto authorize Cloudgeni. You will be routed to GitHub’s OAuth flow. - Choose which repositories to give Cloudgeni access to:
- Select All repositories for full coverage, or
- Select specific repositories with Infrastructure as Code files
- Click Install & Authorize
Step 3: Connect Your First Cloud Account
Connect Cloud Account
Connect Cloud Account
- In the Cloudgeni dashboard, navigate to
Settings->Cloud Accountsfrom the top navigation bar - Click on the Cloud tab
- Select Connect AWS from the integration options
- Click Connect AWS to authorize Cloudgeni. You will be asked for authentication information.
- Provide authentication information:
- AWS Account ID: Your AWS Account ID
- Credentials Name: For easy identification
- Access Key ID
- Secret Access Key
- Click Connect AWS
Step 4: Run Your First Scan
Trigger IaC Scan
Trigger IaC Scan
Cloudgeni scans your IaC repositories on-demand. You can scan any repository again when you merge IaC changes:
- In the Cloudgeni dashboard, navigate to
Compliance->Static Analysisfrom the top navigation bar - Select your IaC repository from the repository selector.
- Click
Scan - The scan typically completes in 10-30 seconds for most repositories
- Infrastructure as Code security misconfigurations
- Security Issues
- Resource exposure risks
- Encryption and access control issues
Step 5: Review Your Security Findings
Understanding Your Results
Understanding Your Results
Once the scan completes:
- Review the list of findings. You can optionally filter using the filter option.
- Review the Findings showing:
- Critical/High/Medium/Low severity findings
- Check Status indicating if the performed check failed or passed
- Location of the finding
- Click on individual findings to see:
- Detailed description of the security issue
- Resource context within your infrastructure
- Impacted Code block
- Further Details about the finding
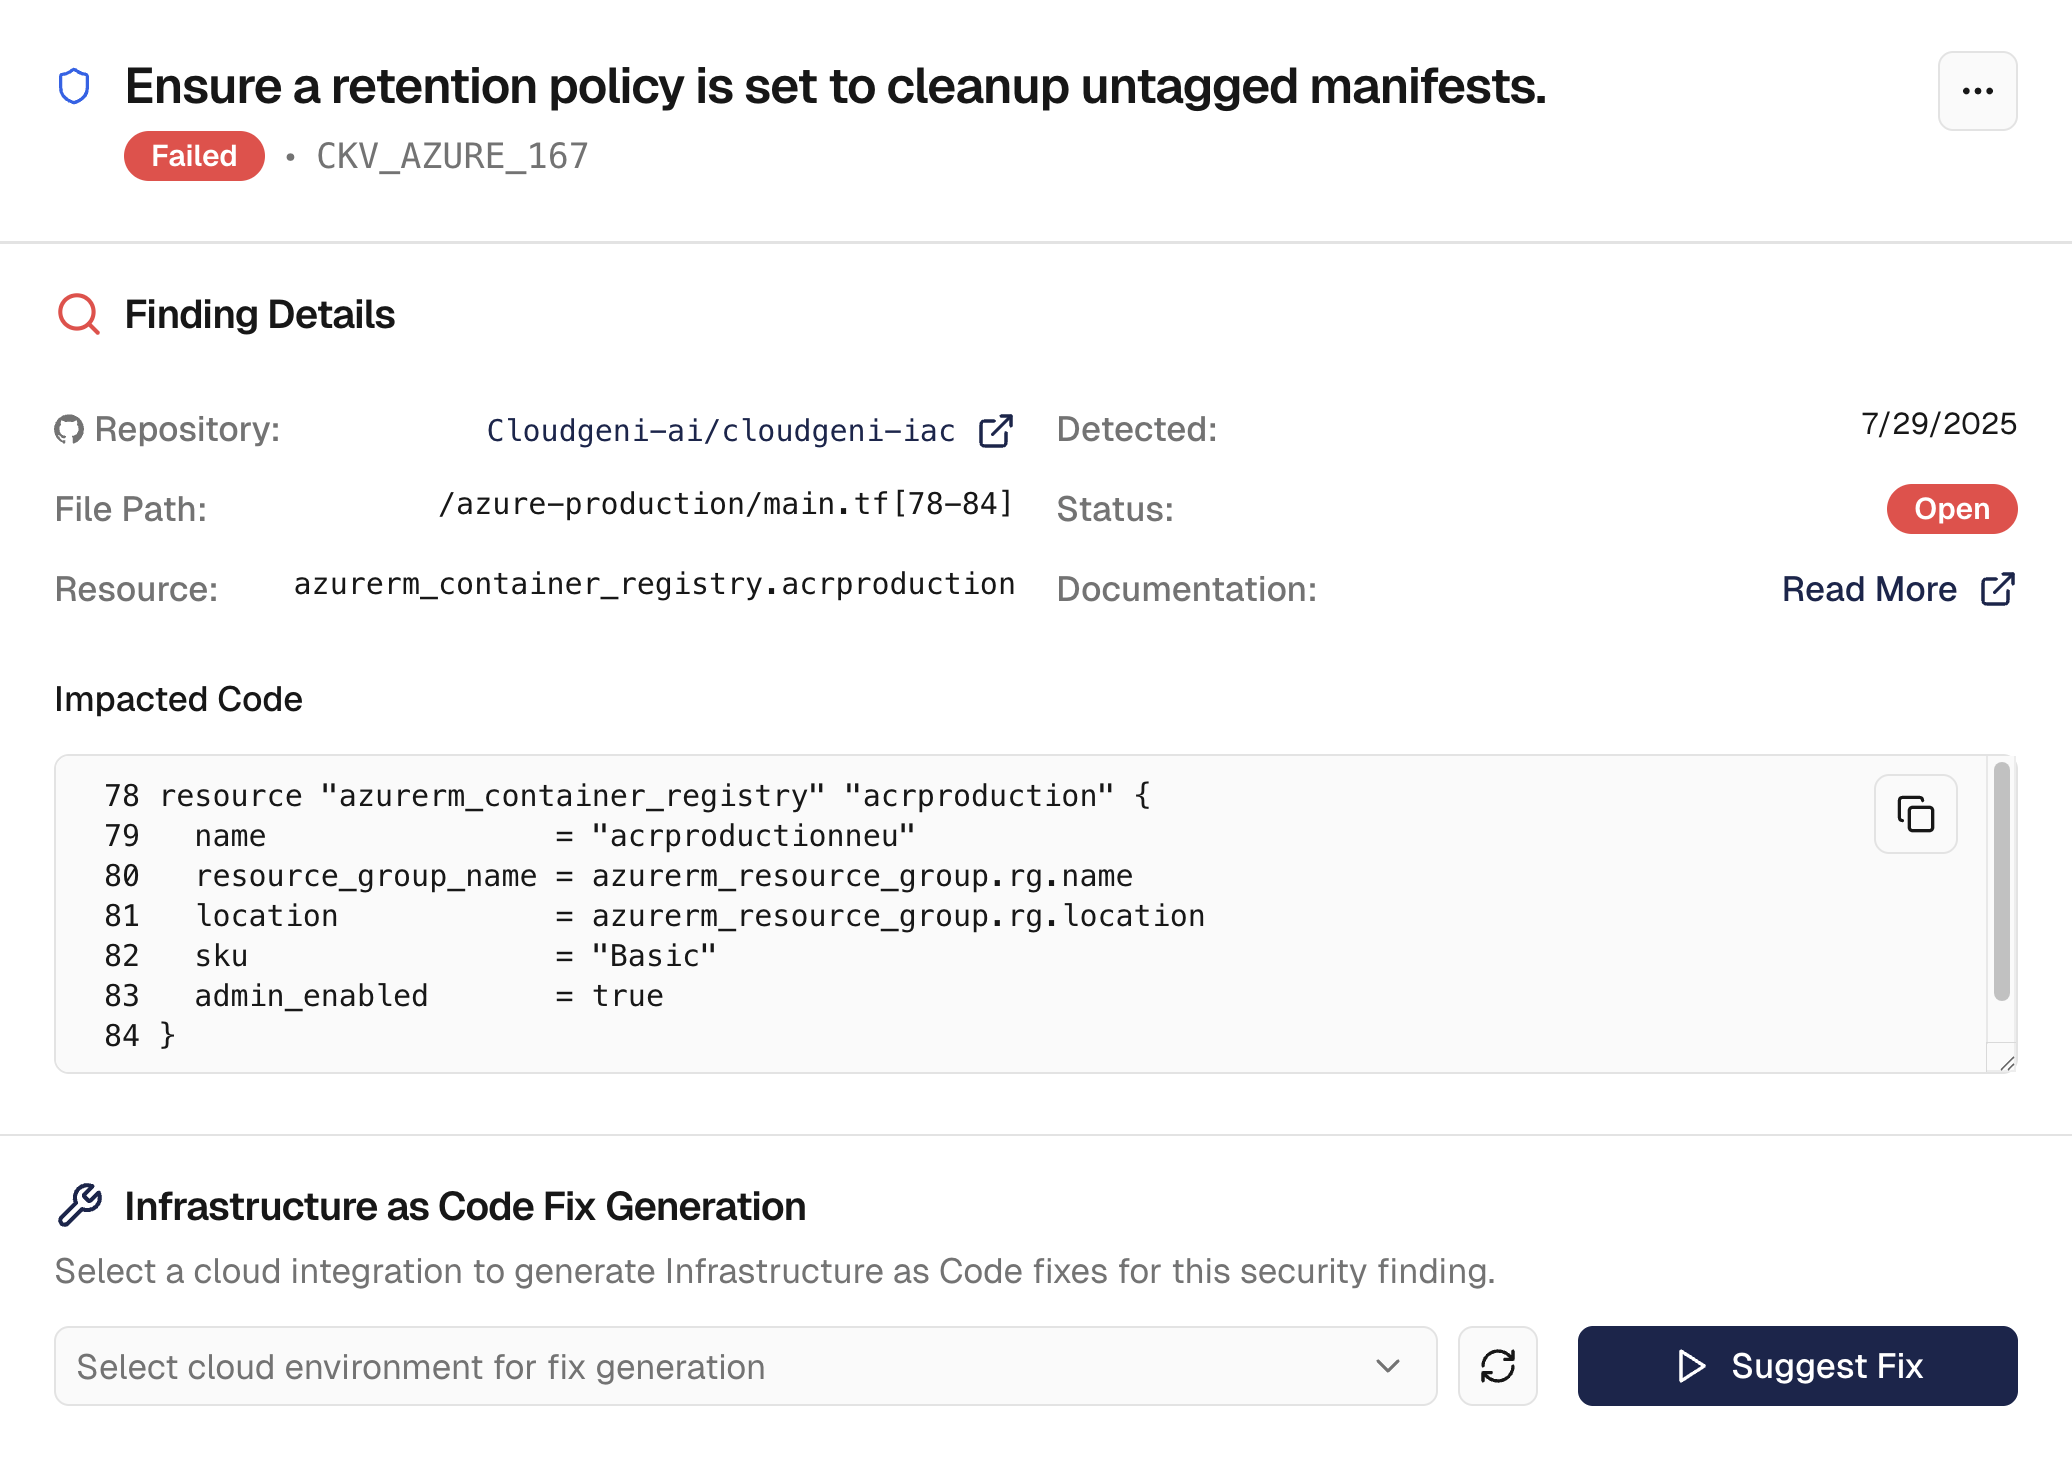
Sample Finding
Ensure a retention policy is set to cleanup untagged manifests.
- Severity: Low
- File:
/azure-production/main.tf[78-84] - Resource:
azurerm_container_registry.acrproduction - Detected:
7/29/2025 - Status:
Open

Step 6: Generate Your First Fix
AI-Powered Remediation
AI-Powered Remediation
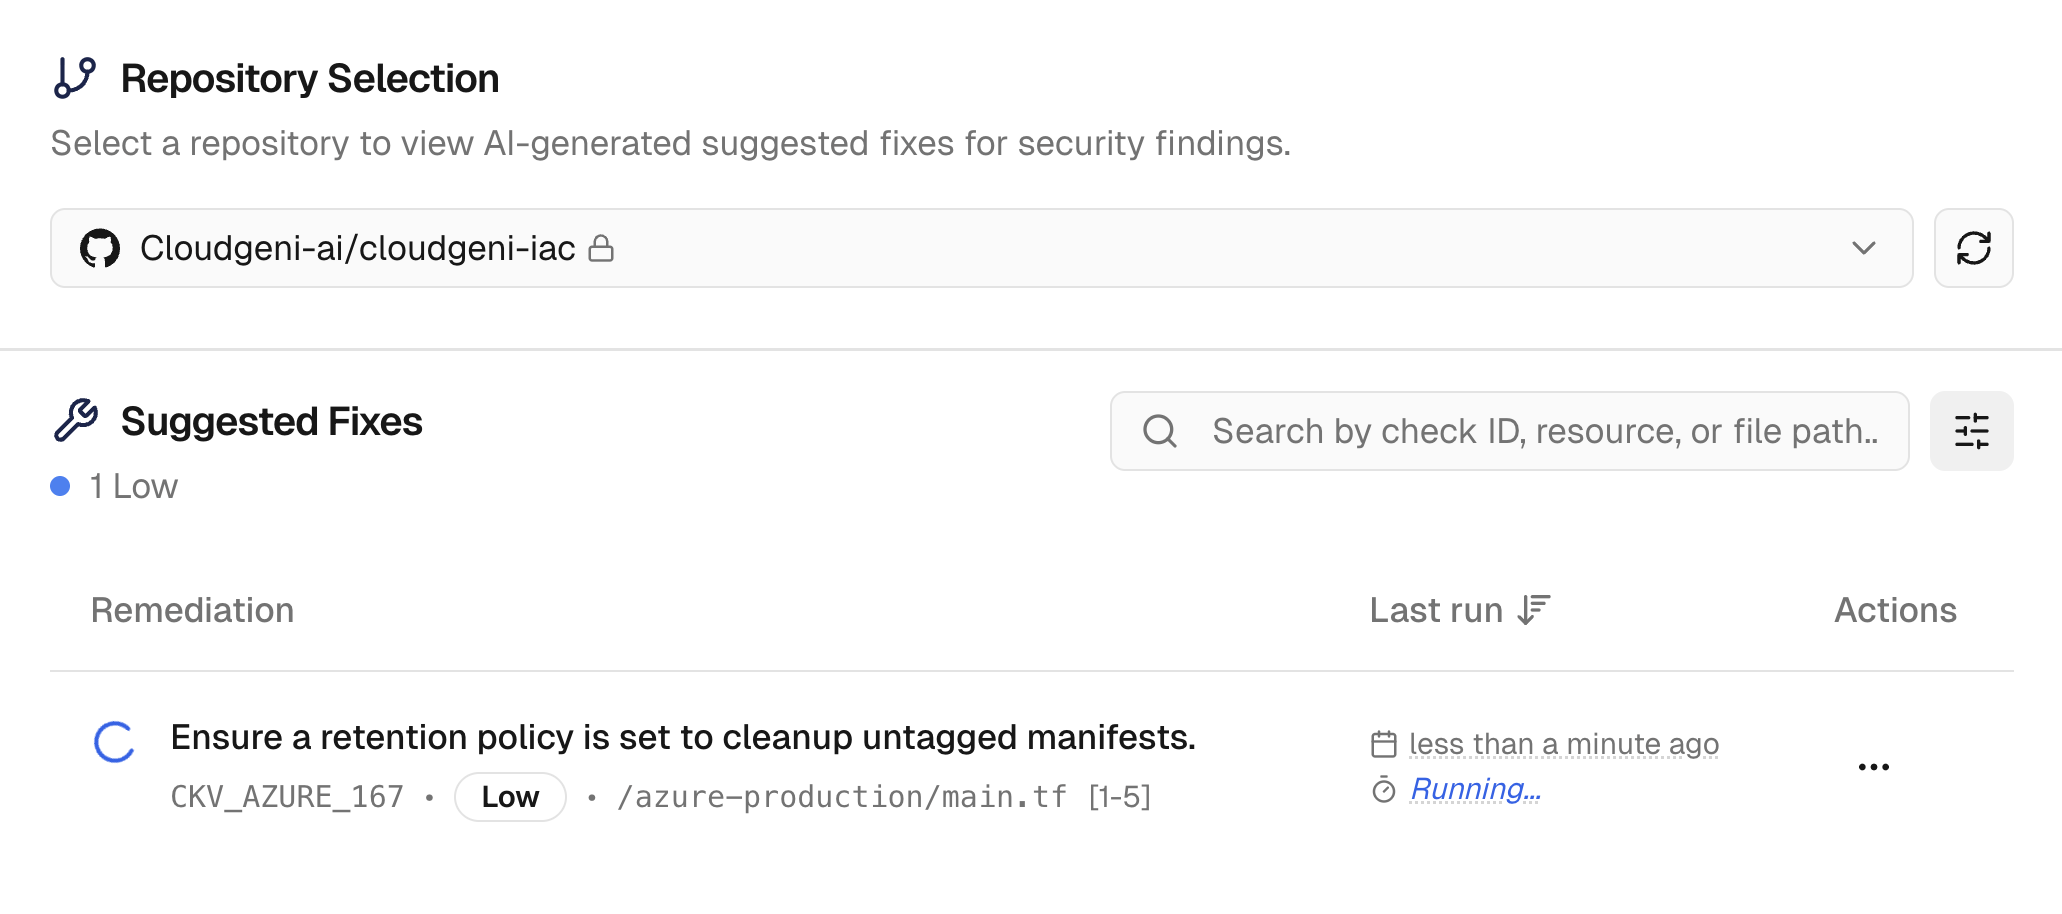
Cloudgeni generates fix suggestions for security issues on-demand:
- Click on a Critical or High severity finding
- Select a Cloud Integration where the suggested fix will be validated in read-only mode. Cloudgeni will never attempt to apply any changes.
- In the finding details, click Suggest Fix. It may take 2 to 10 minutes depending on the issue.

Cloudgeni validates fixes against your actual cloud infrastructure to prevent breaking changes. We will never attempt to apply any changes ourselves. You must review each suggestion carefully before considering creating a pull request.
Step 7: Review Suggested Fix
Review Suggestion and Generate PR
Review Suggestion and Generate PR
Once you review the generated suggestions, you can create a Pull Request against your IaC repository:
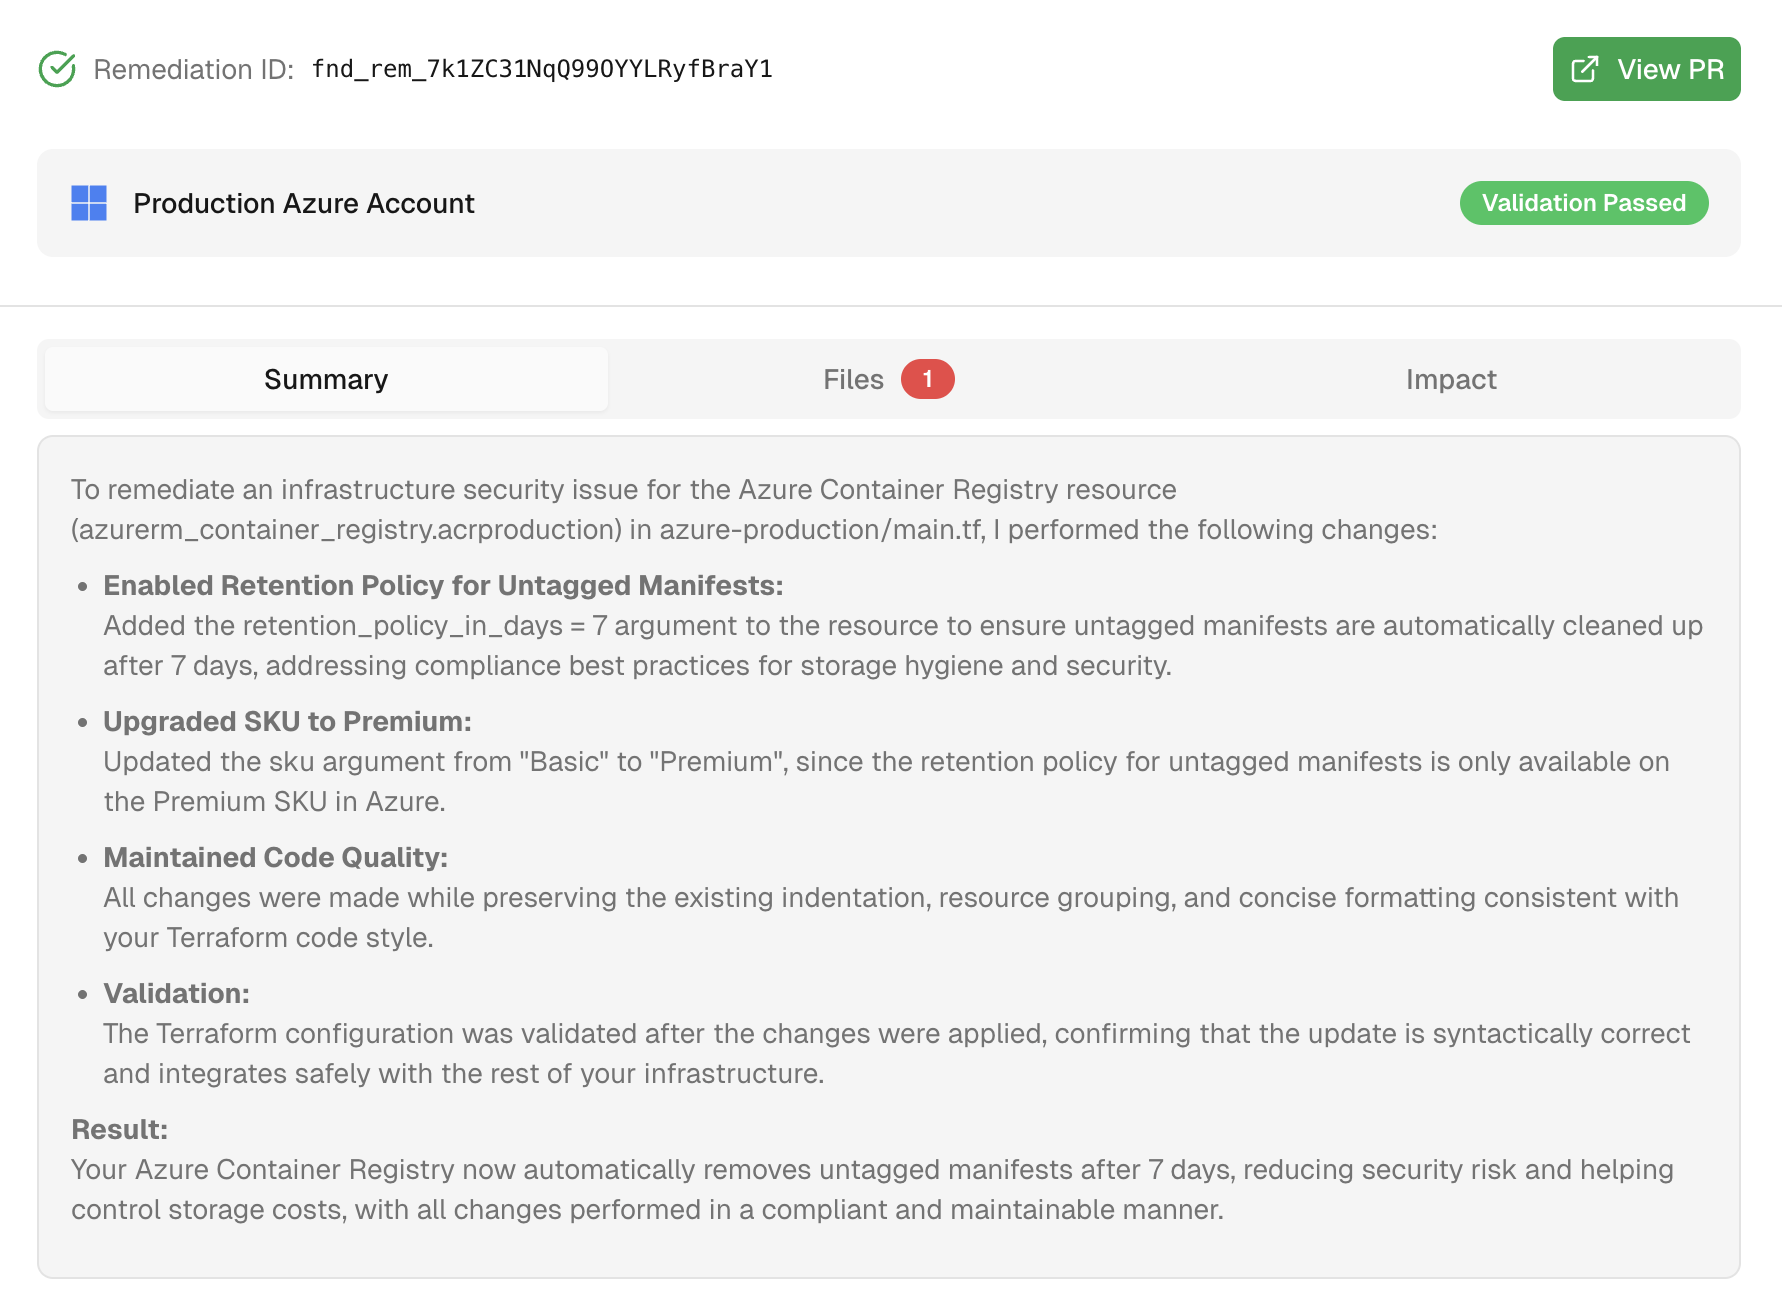
- Click on a suggestion from the displayed list of suggestions.
- In the suggestions details, review the AI-generated suggestion:
- Summary of changes included in generated files
- Files generated for the suggestion
- Impact analysis on your infrastructure
- Validation against your target environment
- Click Create PR to generate a pull request against your IaC repository.
- It takes a few seconds to generate the PR. Once it’s generated, click on View PR.
- You can review and merge the PR in your repository after you ensure that it meets your requirements.

Cloudgeni validates fixes against your actual cloud infrastructure to prevent breaking changes. We will never attempt to apply any changes ourselves. You must review each suggestion carefully before considering creating a pull request.
Verification: Confirm Your Setup
Account created and email verifiedGitHub integration connected and authorized
AWS integration connected and authorized
First repository scanned successfully
Security findings reviewed and understood
First remediation applied (optional but recommended)
What’s Next?
Now that you have Cloudgeni running, explore these next steps:Connect Cloud Accounts
Enable live infrastructure scanning with AWS Security Hub or Azure Defender
Set Up PR Reviews
Automatically review all infrastructure changes before deployment
Configure CI/CD
Integrate security scanning into your deployment pipeline
Custom Policies
Create organization-specific security and compliance rules
Need Help?
Having Issues?
- Can’t connect GitHub? Check our GitHub Setup Guide
- No scan results? Ensure your repository contains
.tf,.bicep, or Terragrunt files - Questions about findings? See Understanding Findings
- Need support? Contact us at [email protected]
Pro Tip: The more repositories you connect, the better Cloudgeni’s AI becomes at understanding your infrastructure patterns and providing relevant security recommendations.